Showing posts with label Frugal Living. Show all posts

Tuesday, May 28, 2013

Mum, Did you know Having a Budget is a Good Idea?

Our Fraser is a thinker and an asker of questions.
The other day he came out with this one ~
"Mum, did you know that having a budget is a good idea?
Do you and Dad have a budget?"

Too cute, don't you think?


It's a very good question, and one that required a good answer.
I trust that's what we gave him when we said yes, and explained why.
How about you?  Do you have a budget?

I cannot tell you how liberating it is to make one if you haven't already.
So liberating.  So freeing.  Not restrictive at all.  Well, not really.
In light of what is accomplished with a budget, it really isn't.
It's not difficult to get on track in this area.
  
There are many resources available to help you get started ~
that is, if you want to start at all.  :)
If you are going to begin, make sure to keep it simple.
And, don't be too hard on yourself at the beginning ~
things will become apparent and require adjusting
as you go along...that's normal.

Another great idea that we've implemented
around here is paying cash for things ~
especially for groceries.  It's been a wonderful thing.
And, it is true...we do spend less.

Just a little food for thought inspired
by my thought-provoking boy.  :)

Many Blessings,
Camille


**Image courtesy of Calvin ~ Thank you my love.  XO


Monday, January 14, 2013

A-mazing Oatmeal Options!

How is your oatmeal repertoire?
Do you even eat oatmeal in your home?
Does it ever get boring to have plain old oatmeal every day?
No, really?  It does?  Yup, me too.
Get ready...because...
This, my oatmeal-weary friends, is the post for you!

Let me share with you some of my new finds ~
A-mazing Oatmeal Options!!
And, yes...they really are that good!!  :)  
 First up ~ Basic Chocolate Oatmeal originally posted by Katie
who writes the "Chocolate Covered Katie" blog.
Okay, is it even right to make your oatmeal into dessert?
Let's not even open up a debate on that one...agreed?  
Oh, and if you don't like chocolate, you won't like this.  :)

Here's what I did to make it mine.
This will make enough for about four ~
depending on hunger levels.  

5 cups Liquid ~ I used half water and half milk ~ 
(or, all of one or the other)
2 cups Old Fashioned Rolled Oats ~
(You could substitute Quick Cooking oats...
just reduce cooking time accordingly)
3/4 tsp Sea Salt

Put these three ingredients into a medium sized,
heavy-bottomed pot.
Bring to a boil over medium-high heat while stirring.
Reduce heat to medium-low and simmer partially covered
for about 8 to 10 minutes, until it gets creamy.

Stir in the following, and mix well ~
3 Tbsp Dutch Processed Cocoa Powder
1/3 cup Sugar ~ I use dehydrated cane juice
1 tsp Vanilla Extract

Cover with lid and let sit off the heat 
for about 5 minutes prior to serving.
Stir in more of your choice of liquid, if necessary.
Serve with a few chocolate chips sprinkled on top (yes, really!).
And, some chopped nuts ~ I like pecans.
Drizzle with milk or cream.

Dig in ~ I dare you!!  ;-)
 Next up ~ Apple Cinnamon Overnight Oatmeal originally
posted on the "Real Mom Kitchen" blog.

A little less dessert-ish, but, completely yummy-ish ~
This recipe fits the bill for a great crock pot breakfast that
can be prepared the night before.
Who does not like to have the morning's work done ahead of time?
And, what could be better than waking up to a cinnamon-y,
apple-ish-ously smelling home in the morning?
Nothing.  That's what!

This recipe will serve six to eight hungry adults.
If you like creamy rice pudding, you will like this.
Yum.  Yum!

One more thing...I found it necessary to fill my
large crock pot half full with water and then I used a 2.5 Litre (2.5 Quart)
casserole dish to hold the recipe ingredients.
I placed this dish into the water and then put the crock pot
lid on the whole thing.
The first time I made this recipe it burned...
perhaps I just have a weird crock pot...
could very well be!


Whatever the reason, it was not pleasant.
Only half the oatmeal was salvageable.
However, the second time I made this, 
I did the insert thing and it worked beautifully!
No burned stuff to scrape off.
And, every last bit of this yummy oatmeal 
was ready to gobble down.

Yippee!! 


3 Gala apples cored and chopped ~ skin on
3 cups Milk
2 cups Water
1 cup Apple Juice ~ I like organic, fresh-pressed
2 cups **Steel Cut Oats ~ uncooked
**(Don't use regular oatmeal in this recipe...
it will become too mushy!)
1/4 cup Maple Syrup 
2 Tbsp Butter ~ cut into little pieces
1/2 tsp Sea Salt
1 tsp Vanilla Extract
1/4 cup Brown Sugar
2 tsp Cinnamon ~ ground

Butter your casserole dish.
Mix all ingredients together and carefully pour 
into the casserole dish.
It will come nearly to the top.
Stir well.

Place into your crock pot. Put the lid on.
Turn the heat to low and set on the counter
to cook while you sleep.
This will take about 7 to 8 hours.

Mine burned after about 5 hours on my first try,
when I cooked it directly in the crock pot.
No fun!  I woke up at about 4:30 am to the smell of burnt sugar.
Take my advice, and use the casserole set-up
and there will be no issues.
It is so worth it!!

In the morning, remove your casserole dish
from the crock pot and stir the oatmeal prior to dishing it out.
Serve with chopped pecans, raisins,
a little more brown sugar and milk or cream.
Enjoy!!  And...do let me know what you think!  :)

Many Blessings,

Camille

Wednesday, January 9, 2013

After Ten Years...

After ten years of cutting Emma's hair exclusively,
I finally took her to the hairdresser.
The boys are a different story.
No one has ever cut their hair but me.
Up until yesterday, I could say the same for my Li'l Em.

In the spring, after the wedding,
Emma asked to have her hair bobbed.
I complied.
However, it was challenging to do,
and I was forever *correcting* it!
She was planning to grow out her bangs at the same time.
And, that's what she's been doing.
All good, until now.
It needed a little (or, a big) professional touch.
And, that was where this idea came in.
It may be another ten years before we do this again,
so, I thought it necessary to capture the experience in photos.
Our hairdresser kindly consented.
And, she even agreed to let me post them on this blog.
She also taught me ~ A LOT!!
When it came time to pay,
she told me the cut was free,
but, that I would have to pay for the lesson.

Wasn't it sweet of her to teach me?  
I didn't even ask!  :)
Many of the photos captured the hairdresser's hands
flying about...they were blurry so often!  
MUCH quicker than mine when I do Emma's hair ~
Just ask her about it sometime!  ;-)
They both look like they had an
enjoyable time, don't you think?
Two lovely ladies.  :)
Now, if I can just remember what I learned,
it will be a very good thing.  

Many Blessings,
Camille

Monday, January 7, 2013

Money Matters

Let's talk money.
Cash.  Credit.  Plastic.  Budget.
Because it matters.

My husband and I were both raised with conservative
money management ideals.
The credit card was to be completely
paid in full each and every month.
That's what we were taught.
That's what we've always done.

We've lived with a budget for years.
But, I felt there was room for improvement.
And boy, was I right!  

Recently, I challenged myself to use cash 
to see if there would be a difference in my shopping habits.
And, to my surprise, and delight,
it has been successful!

I have not done the *Dave Ramsey* course.
But, I've read enough about it
to make me sit up and take notice.
Cash envelopes.  No credit card use.  Budget.  Emergency Fund.
These were some of the things mulling about in my brain.

Would it really make a difference to use cash?
Would I really spend less?
After all...we were using credit like cash, weren't we?

Apparently not. 
The concept is simple.

Set a budget.
Decide what you are willing to spend
in the month and set that money aside for specifics.
Give each dollar a job to do.
Savings, spending, food, rent, giving, etc.
Determine ahead of time what is reasonable.
Do your best to stick to it!

There will be bumps along the way.
If you've never budgeted before, 
you may have no clue where your money goes.
That's okay.  You'll soon find out!  :)

It can take a few months to get into the 
swing of things with a budget.
Tweaking is allowed.
In fact, it's encouraged.

I'm not going to get into the specifics here.
But, this one thing I will say ~
Absolutely (without a doubt!),
paying with cash helps keep me on track.
It helps to keep me accountable.
At least, that's been my experience!

And...the money?
It goes further.  

Oh, and one more thing.
I'm in control of it, and not the other way around.
It's very liberating.  Freeing.
Try it!  I'm sure you'll be glad you did! 
I can't believe we didn't do this sooner.  :)

Many Blessings,
Camille


**Image in this post courtesy of Calvin ~
Thank you my love!  XO


Monday, June 11, 2012

Dishwasher Detergent Update

Do you remember when I posted about
I quit using the recipe I shared
due to the fact that a mysterious film
continued to appear on my freshly washed dishes.
I was not willing to put up with it.

I threw in the towel.

The time has come to give it another try.
At the time of that post, my friend Trisha
left her recipe in the comment section ~
Thank you for sharing Trisha! :)

It's very simple.


One part Borax to one part Baking Soda.
That would be the cooking kind,
and not the washing kind of soda.
Mix together and store in a glass jar.
Use like you would your regular detergent.
(I use about 2 Tbsp per load ~
please ignore the photo above for dispensing amount)

So far, it has worked!

The only thing that I have noticed
is that this does not work as well as the
pre-packaged, store-bought stuff on pots.
When I want to wash pots in my machine, I don't use this.

Otherwise, it is a winner in my books.

I use white vinegar in the rinse dispenser.
We do not have hard water where we live.
I don't know if those things make a difference.

Overall, my initial findings are positive.
And, it is SO much cheaper!
And, healthier?

Let me know if you give it a go.
I hope it works for you too!

Blessings,
Camille

Friday, May 11, 2012

Budding Entrepreneur?

What do you think?
Will anyone hire these two?


Emma created this flyer by herself.
I don't know if Natalie is aware
of what she's been committed to. :)

The flyer says ~
(and I quote)

"Emma and Natalie
at your service!
$2.00 each

Natalie and Emma
will pull your weeds,
plant your flowers,
rake your lawns,
and sweep your driveway.

If you would like us to do this
for you...please call!

We could do this on Monday,
Wednesday, Friday and Saturday.
We do not work on Sunday.

Thank you."

At that price,
I think I'd be foolish
not to employ them ~
Wouldn't you agree? :)

Many Blessings,
Camille

Friday, April 20, 2012

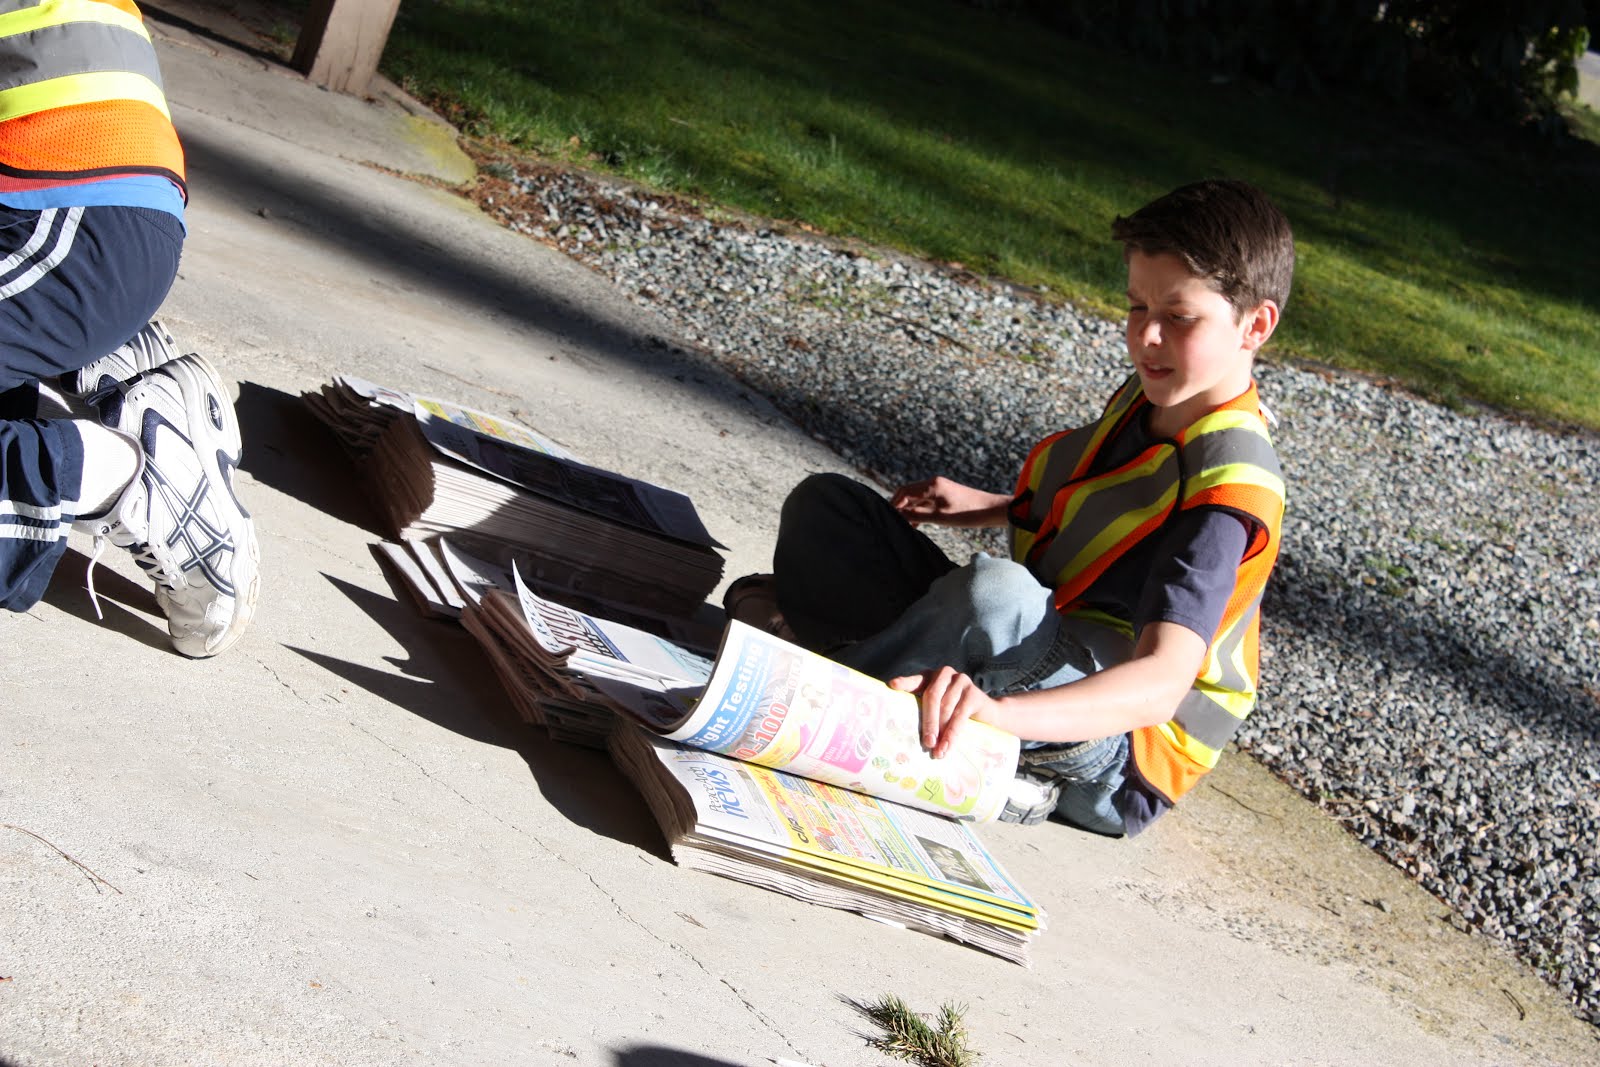
Paper Route ~ A History

We have lived on our street
for over 17 years.
When the children were little,
I observed the paper route
family as they dutifully delivered
week after week.

Two papers per home.
Twice per week.

One family was employed
by both papers.
They were delivered
on the same days
to the same homes.

I was intrigued.

As they passed by our home,
on occasion, I let it be known
that if they were ever going
to give up the route,
we would be interested.

At the time,
our children were very young.
If I remember correctly,
Emma was just a newborn.
She may not even have been a
part of the family yet ~
I cannot recall.

But, I could see the potential.
And, I was right! :)


It was something the children
and I could do together.
The routes were
eventually given up.

But, not to us.
Two papers.
Two different families.

And I was back to square one.

This time around,
I called the papers
and got my name on the list.
If ever the routes should become vacant,
we were in line for the take-over.

It took time.
First, one paper became available.
And then, about six months later,
the other one.

Seven years ago this June
was when we began.
Austin was 10 years old,
Calvin was 8, Fraser was 5,
and Emma was 3.

It was busy.


But, we did it.
Together.
The five of us.
Rain, snow, hot sun, and
everything in between ~
We delivered.

And we saved.
I paid the children a small
amount each time,
and the rest was socked away.

After two years and four months,
we had enough money to
go on a family vacation.
All the way to Florida!

The children were very excited that
they were able to take
Daddy on a holiday!
Very excited ~
And so was I. :)

(Of course, travel rewards
were used and whatever we could
get for *free* was secured ~
BUT ~ the cash portion of the trip
was paid for with our paper route savings).

That was in 2008.


When we arrived home from
our holiday, the boys
took over the route as I was no
longer needed.

The boys were old enough to
do it all by themselves
.
Emma was still too little.
Her paper route days were over.

Until recently.

Austin withdrew himself from
the roster last summer,
and Emma took his place.
(Thoroughly protected by her
brothers, of course)!

She's pleased to be able
to earn a little money again.
Actually, it's more than a little.
Since the children do it without my help,
they equally divide the proceeds.

It's a sweet deal.


Unfortunately,
that means I am out of work.
(Is a Mum every really
out of work)?!

Currently, I'm trying to
figure out a way to build up
my reserves ~ LOL!

Many Blessings,
Camille

Wednesday, June 1, 2011

Simply Guacamole!

Super Easy!
So. Good. For. You.
Y.U.M.M.Y.

Simply Guacamole.
(Gwa-ka-moe-lee)


I use three or four ripe avocadoes.
(They are ripe when dark in colour
and slightly soft).

Wash the skin and slice length-wise
through to the pit.
Split in half and remove the pit
with the tip of your knife.

Scoop out the flesh with a spoon.
Mash with a fork.
Add in the juice of one lemon.
A splash or two of Hot Sauce.
And a shake of garlic powder.


Mix together.
Taste and adjust seasonings.
Chill and serve.
Enjoy! :)

Monday, May 16, 2011

Homemade Toothpaste


Well...

I wouldn't say it's a big hit.

I wouldn't say it isn't working.

But, it seems to be far better for
you than many of the choices out there...
including some of the *healthy* alternatives.

In my research I have read that
glycerine can adhere to the teeth and prevent
recalcification of the enamel.
I don't know if this is true or not.
Does anyone know?

The *natural* toothpaste we have
in our posession has glycerine in it.

Hmmmm.....

Easy as pie.
Simple.
And, not too bad.

There is, however,
a background flavour of Baking Soda
that is difficult to get rid of.

It lingers.

I will say, though, that
my teeth feel clean,
and it is cheaper
than what I've been doing.

Soooo....
without any further ado.

Here is *my* recipe...
tweaked and modified
from some I found online.


1/2 cup coconut oil (extra virgin organic)

2 TBSP Baking Soda

Stevia powder to sweeten to taste

Essential Oils of Peppermint or Spearmint...or both ~
Add as much as you like to get the flavour you want.

Mix together in a bowl with a fork.
Put into a little container.
Scoop out what you need with a spoon or knife
and put it on your toothbrush.
Not as convenient as a tube.
But, if it saves money and does the job
without chemicals and fluoride...
well, it may be worth it, right?


I recently broke down and bought some more of
the Nature's Gate Toothpaste.
We were having an out-of-town guest
(who I thought would borrow what we had
in the drawer) and she would have been
subjected to my homemade creation.
I didn't want to force her into
that experience. LOL!

AND, in my defence...it was on sale!

Sooooo....will this last??
Will I experiment some more??
Time will tell.

Have fun!
And do let me know how
it goes! :)

Blessings, Camille

Thursday, April 28, 2011

Homemade Dishwasher Detergent


There are some scary ingredients in
*regular* dishwasher detergents.

For awhile now I have been using
a more natural alternative.
BUT...it is prohibitively expensive!

And...now that I am making more
messes in the kitchen
than ever before ~
and running the dishwasher at least twice a day ~
I needed to find a more frugal solution while
maintaining my requirement that it be *healthier*
than the *regular* stuff.

Here is the solution I came up with ~
Homemade Dishwasher Detergent.
(Click on the link provided to find the recipe)

And, click here to find
Citric Acid for purchase.


Does anyone know if I've been led
down the garden trail here?
Is this stuff really better for you?
I can tell you for certain that it is cheaper!

MUCH cheaper!

One thing to note ~
It seems to *clump* after a few days...
so, you may want to just make a small batch.

If you use too much for your machine,
it seems to leave a little film on the glasses.

Ask me how I know.

Make sure you use vinegar in
the rinse aid dispenser and
turn the dial to release the largest amount
per wash load.

And, of course,
Do NOT do this! ;-)

If you give it a try,
please let me know what you think!
And, if you have any suggestions
or answers to my questions...
please share! :)

Next up on my *to try* list...
Homemade TOOTHPASTE!! :)

Tuesday, January 18, 2011

Homemade Pizza ~ Crust and All!


"Easy as pie"...
or so the saying goes!
More on that another day perhaps.

But for today...
I want to share with you my favourite
pizza crust recipe.

Do you ever buy the premade crusts
for ease of operation
and fuss-free preparation?

Have you ever added a frozen pizza
to your cart at the grocery store?
If so, this post is for you.

Don't feel bad...I've done it too!
But, it isn't necessary...
this pizza recipe is ~

Oh. So. Easy.

Pizza Crust ~
from scratch.
Quick and painless...
I promise! :)


One thing I like about this dough is it's quick.
Really, it is!
The secret is in the yeast.
This recipe calls for *instant* yeast,
and doesn't require a *rising* time ~
you just let it *rest* for ten minutes
before rolling it out.

P.E.R.F.E.C.T.I.O.N.

It's a great place to begin if you've never made bread.
Won't you give it a try?
Please?


~ The Recipe ~
~ Dough for One Pizza ~
FYI ~ I make two large pans (double this recipe)
for our family of six
**Recipe courtesy of my Sister-in-Love**

2 Cups flour (divided)
1 Tbsp Instant Yeast
1/4 tsp Sea Salt
1 Tbsp Sugar
3/4 cup Warm Water

Mix together 1 cup flour,
yeast, salt and sugar
in a large bowl.
Stir in water.
Knead in as much of the remaining 1 cup of flour
as is needed to make a soft and not too sticky dough.
This will take about 5 minutes of kneading.
Let rest on counter for 10 minutes.
Roll dough out to fit your pizza pan,
use a light dusting of flour on the counter to keep
the dough from sticking.
Press into prepared pan.
(I use parchment paper,
but if you don't have it, grease the pan)

Just a little note ~ I don't have pizza pans,
I use cookie sheets...
they work just fine. :)

Once your pizza is assembled,
you bake it for 20 to 25 minutes at 400* F ~
Let rest in pan for 5 minutes before cutting.

Now...how to assemble a pizza?
This is the fun part!
Almost anything goes.


Make it simple or make it fancy.
Pizza is very versatile.


Gather together your toppings.
Mozzarella cheese ~ shredded, of course.
Pizza Sauce or some sort of tomato base.
Pineapple tidbits ~ drained.
Sliced pepperoni or other pizza meat
(You can even use scramble fried
ground beef with chopped onions)
Chopped red, green or yellow peppers
Italian Seasoning for garnishing

Other ideas ~
chopped sun-dried tomatoes,
chopped artichoke hearts (really!),
chopped onions,
chopped jalpeno peppers (for some kick),
etc....


The trick to get a soggy-less pizza is to not overdo the toppings.
Ask me how I know. LOL!

Spread a very thin layer of your pizza sauce on the unbaked crust.
Layer the meat over the sauce.
Sprinkle a handful of chopped ingredients over top ~
if you are using pineapple, do NOT put it on yet!
Sprinkle a large handful of mozzarella cheese over all.
Pineapple tidbits (well drained) if you are using them,
would go on now...on top of the cheese.
Sprinkle with Italian seasoning (if desired).

Bake as indicated above.
Slice and enjoy!


Tuesday, November 9, 2010

Dressing Up the Lentils

I have never been excited about lentils.
They have never been interesting to me.
Never, that is...
until now.

A trusted source for recipes is a wonderful thing.
I am fortunate enough to have a few.
This came from one of them ~
I have not been disappointed with her recipes yet.

I was prepared to be disappointed this time ~
After all, we are talking about lentils!

BUT I wasn't.
None of us were.
We all liked them ~
A LOT!

One thing to mention ~
We had them the first time with brown rice and
a lovely green salad on the side.
You could go back and forth between the flavours.
The meal was a HIT!
Everyone had seconds.
As it should be...
the sign of success.

The second time around, a HUGE pile of rice and lentils
was dished out to each guest around the table ~
without the salad on the side for balance.
The salad had been enjoyed as the first course.

The second course completely lost its shine ~
as you might imagine.
These lentils
sparkle brightest as a side dish.
In that supporting role,
you will find it difficult to resist a second serving.
Really, it's true!

Lesson learned *the hard way* ~
Do NOT serve these lentils in a HUGE mound unaccompanied.
BUT DO serve them...you won't be sorry you did!

I do hope you try them out...
with a lovely green salad on the side! ;-)


Sweet and Sour Lentils ~

Click on the name above,
and you will find the post with the recipe in it.
Entertainment awaits...she always entertains while talking about food.
Read through, or just skip right to the bottom of the post,
and there you will find what it is you are looking for.
I think you will agree...they are worth the hunt! :)

I made them exactly as stated, but for the following few adjustments ~
I soaked the lentils prior to cooking,
I used dehydrated cane juice instead of brown sugar,
and I also used organic apple juice.

The recipe, as is,
would feed about four *normally*...maybe more?
I made double.

Any questions?
They really are super easy...and delish!
ENJOY!

Sunday, October 24, 2010

With a Little Advance Planning...

Does the thought that Christmas Day is just a little more than
EIGHT weeks away cause despair to rise within you?

It shouldn't.

What is the Christmas season all about, anyway?
Perhaps, before we go any further, we should
refocus on what really matters.

And then ~
make a little plan.
And stick to it!

This post is all about the gifts.
Ideas for those on a budget ~
Aren't we ALL on a budget?

Hopefully there is something here for everyone.
Enjoy the journey.
It is a joy to give.
And it really IS the thought that counts...
not the $$$ spent!
Give a little love this Christmas.

And be ready to share the
REAL Gift of Love with others
.


Everyone loves a
personalized Gift Basket.
Tailor it to suit the one you are
planning to give it to,
and be prepared for a joyful response.

Gift baskets can be put together in a small bowl,
large basket, and everything in between.
I have even had one of these given to
me in a laundry basket ~ when our girl was born.
Use your imagination and have fun!

What you see in the basket above are some homemade
goodies from my kitchen.
Caramel Corn
and jam are two of the items included.
Give what your recipient wouldn't
normally make for themselves.


Begin a Library of Quality books
for a young person in your life.


Faith-Building Audio Drama
for kids (and their parents)
is a wonderful idea for a family with children
from age six to twelve (and beyond).


Focus on the Family Radio Theatre
is WONDERFUL for any family ~ for all ages!
There are, of course, certain stories that
the very young would be frightened by,
but you are quite safe with
titles such as "Little Women",
"Anne of Green Gables" and "Silas Marner".
I cannot tell you how much we have enjoyed these ~
over and over and over again!


How about something sweet for neighbours,
family and friends?
Caramel Corn
is something not many can refuse.
And packaged up pretty,
it is a welcome hostess or teacher gift.


Another neighbour or teacher gift is the
"Gift in a Mug".
Pretty and economical...
as long as it is hand-assembled, of course!


For little people on your list ~
I cannot recommend
these sweet books
highly enough!


An "Answers" Magazine Subscription
would be a great blessing for any family on your list.
The material presented is from a Biblical Worldview
and is a wonderful tool to fortify every member
within that home.
We ALL *love* to find the next installment
in our mailbox.

If you have NO MONEY to spend on gifts...
take heart!

There are MANY ways to show love and give of
what you DO have to loved ones.
Some of your TIME.

What about a coupon booklet?
Handmade by you?
Custom designed and hand-written.

Make coupons for things such as these ~

"I will clean your car one Saturday...name the date!"
"I will take you to..."
"Date night IN...leave all the details to me!"
"I will bake your favourite...anytime you ask!"
"I will read your favourite book to you one afternoon"
"We will go to the park and swing on the swings..."
"Good for one day of housecleaning!"
"Free babysitting one night while you go out."

Etc...

The possibilities are ENDLESS!

Then...make sure YOU keep track of what you've
promised to do and keep the recipient of your coupons
accountable to take you up on it!

Remember to take time to enjoy
this time of year.
The LORD is not honoured by
our overdoing it ~
Who are we aiming to please anyway?

May this Christmas Season be full
of love and joy and peace ~
And may the Lord Jesus Christ
be at the center of it all!

Blessings to each of you!
In His Love,
Camille

Wednesday, September 22, 2010

Fast Food ~ Homemade!

Ever feel like just taking the family out to eat at
a fast food restaurant after a long day?
Does making dinner sometimes feel like an overwhelming
task to tackle?

Don't give in to that feeling!

After all, you have to pack everyone up into the car,
unload them all at the restaurant,
keep them safe while you are there,
load them back up again,
and maybe even give them all
baths them when you return home!

Here are a couple of quick solutions I use.
Would you like to share some of your ideas
in the comments section?
I'm sure we would all benefit from some fresh inspiration for the
"I can't make dinner tonight"
thoughts we sometimes think! :)


How about whipping up a salad with pre-washed organic greens,
half a tin of salmon, any assortment of chopped veggies ~
I especially like to add some sliced avocado ~
and a handful of raisins added in for good measure?
Make this up on individual plates ~
this saves on dishes and ensures that the ingredients are
distributed evenly amongst your guests.
Serve with a roll or slice of bread on the side.
Voila! Dinner is served!


Scambled or fried eggs anyone?
Make it colourful by quartering a tomato on the side.
Serve with steamed veggies and a roll or toast.


We have even had a feast of corn on the cob.
Yum Yum!

Ideas anyone?
Add them into the comments section ~
It would be wonderful to hear from you!

Blessings,
Camille

Tuesday, September 7, 2010

The Benefits of Stock

Homemade stock (chicken, beef, or fish)
is something I have been learning more about this past year.

Why did Grandma make broth?

Was there a purpose to it,
or was it something she just couldn't buy in cube form?
Maybe the answer is BOTH!

Last winter I made chicken broth faithfully ~
it was a staple in our diet.
I don't know whether it's by coincidence or not,
but we had the healthiest winter we can remember since having children!


Michelle at "She Looketh Well" posted an amazing video tutorial
on her blog to demonstrate the step-by-step method she uses to make stock.
I do mine in basically the same way and it is WONDERFUL!!
Just click on the link above to find her tutorial video.

Two of my favourite uses for this chicken stock are
Homemade Chicken Noodle Soup and
Tanya's Turkey Soup.
Yum Yum!

**Update ~ I answered questions that were asked
in the comments section in another post.
Find it by clicking here.

Sunday, August 29, 2010

Beautiful Blackberries!

There's nothing quite like freshly made
blackberry syrup to enjoy with
Grandma's Waffles!

YUM YUM!

Memories are stirred from
my own childhood days.
We would pick
SO. MANY. BERRIES.
that they would seem to take over the kitchen.

The children and I together got one large bowl full ~
And it only took an hour of picking to fill it.
The process of straining and
cooking up the berries was time-consuming.
BUT well worth the effort!


It's a treat when they are easy to pick!


Reaching for the "best" berries...
always a *little* bit too far away!


Watch out for thorns...they really grab on!


Often they hide under leaves...we hunt for them.


OH. THE. BLISS.

That first taste of yummy syrup was payment enough.
Want to know the "recipe"?
Want to know the "secret"?

I want to tell you that it has taken years to chisel this out.
There was no "tried and true" recipe that I knew of.
It was all "trial and error".
Many of the past jars of "syrup" were really
nothing more than less than firm jelly.
I had to heat it up to get it to the right consistency.

But now...
I think I've got it!
And I'm going to share the "secret"
with all of you! :)

How to go from this...


To this...


To bottled up yumminess!


~ Blackberry Syrup ~


10 cups extracted Blackberry Juice
1/4 package Certo Light Crystals (1 Tbsp)
7 cups Evaporated Cane Juice (Or White Granulated Sugar)
(This is enough for six pints of syrup)

How to make it?

~ Pick the berries

~ Wash the berries

~ Heat the berries just a little and mash
with a potato masher to get the juices flowing

~ Strain the berries with cheesecloth or a strainer to extract the juice
**Be patient**
This step takes quite awhile ~
I found that it took my batch about 4 or 5 hours of drip-drip-dripping :)

~ Measure the juice and hopefully you have enough,
if not, adjust the recipe accordingly

~ Wash your pint-size jars (2 cups) and lids
in hot soapy water and rinse REALLY well

~ Put your glass jars on a cookie sheet in the oven set at
225 degrees to sterilize them
(they should be in there for at least 20 minutes...
leave them while you make the syrup)

~ Boil water in your canner (fill it a few inches from the top)

~ Boil a little pot of water for softening the sealer lids
(don't put the lids in just yet)

~ In a very large pot put your blackberry juice and stir into it
the 1 Tbsp of Certo mixed with 1/4 cup of the sugar

~ Bring to a boil over very high heat (stirring)

~ Stir in remaining sugar and continue stirring...
return to a boil and boil hard (cannot stir down) for 1 minute

~ Remove from heat and stir and skim off foam for 5 minutes

~ During this 5 minutes of stirring,
put your sealer lids into the recently boiled water

~ Remove jars from the oven and fill to 1/4 inch from the top with
syrup, wipe with a clean cloth and place the sealer lid on and screw band
until finger-tip tightened

~ Place in the canning rack and lower into the
boiling water canner

~ Be sure the water covers the tops of your lids by one inch

~ Cover and keep at a gentle boil and simmer 10 minutes

~ Remove from the canner and set aside to cool

~ You should hear the *pop*pop*pop* of sealing jars within minutes of
removal from the hot water bath...SUCH a satisfying sound! :)

Any questions?
Feel free to ask!
I do hope you give it a try...
it really is super yummy!

Blessings,
Camille